Apache Geode in 15 Minutes or Less
Need a quick introduction to Apache Geode? Take this brief tour to try out basic features and functionality.
Step 1: Install Apache Geode
See How to Install for instructions.
Step 2: Use gfsh to start a locator
In a terminal window, use the gfsh command line interface to start up a locator. Apache Geode gfsh (pronounced “jee-fish”) provides a single, intuitive command-line interface from which you can launch, manage, and monitor Apache Geode processes, data, and applications. See gfsh.
The locator is a Geode process that tells new, connecting members where running members are located and provides load balancing for server use. A locator, by default, starts up a JMX Manager, which is used for monitoring and managing a Geode cluster. The cluster configuration service uses locators to persist and distribute cluster configurations to cluster members. See Running Geode Locator Processes and Overview of the Cluster Configuration Service.
- Create a scratch working directory (for example,
my_geode) and change directories into it.gfshsaves locator and server working directories and log files in this location. Start gfsh by typing
gfshat the command line (orgfsh.batif you are using Windows)._________________________ __ / _____/ ______/ ______/ /____/ / / / __/ /___ /_____ / _____ / / /__/ / ____/ _____/ / / / / /______/_/ /______/_/ /_/ 1.14 Monitor and Manage Geode gfsh>At the
gfshprompt, type thestart locatorcommand and specify a name for the locator:gfsh>start locator --name=locator1 Starting a Geode Locator in /home/username/my_geode/locator1... ................................. Locator in /home/username/my_geode/locator1 on ubuntu.local[10334] as locator1 is currently online. Process ID: 3529 Uptime: 18 seconds Geode Version: 1.14 Java Version: 1.8.0_121 Log File: /home/username/my_geode/locator1/locator1.log JVM Arguments: -Dgemfire.enable-cluster-configuration=true -Dgemfire.load-cluster-configuration-from-dir=false -Dgemfire.launcher.registerSignalHandlers=true -Djava.awt.headless=true -Dsun.rmi.dgc.server.gcInterval=9223372036854775806 Class-Path: /home/username/Apache_Geode_Linux/lib/geode-core-1.0.0.jar: /home/username/Apache_Geode_Linux/lib/geode-dependencies.jar Successfully connected to: JMX Manager [host=10.118.33.169, port=1099] Cluster configuration service is up and running.
If you run start locator from gfsh without specifying the member name, gfsh will automatically pick a random member name. This is useful for automation.
Step 3: Start Pulse
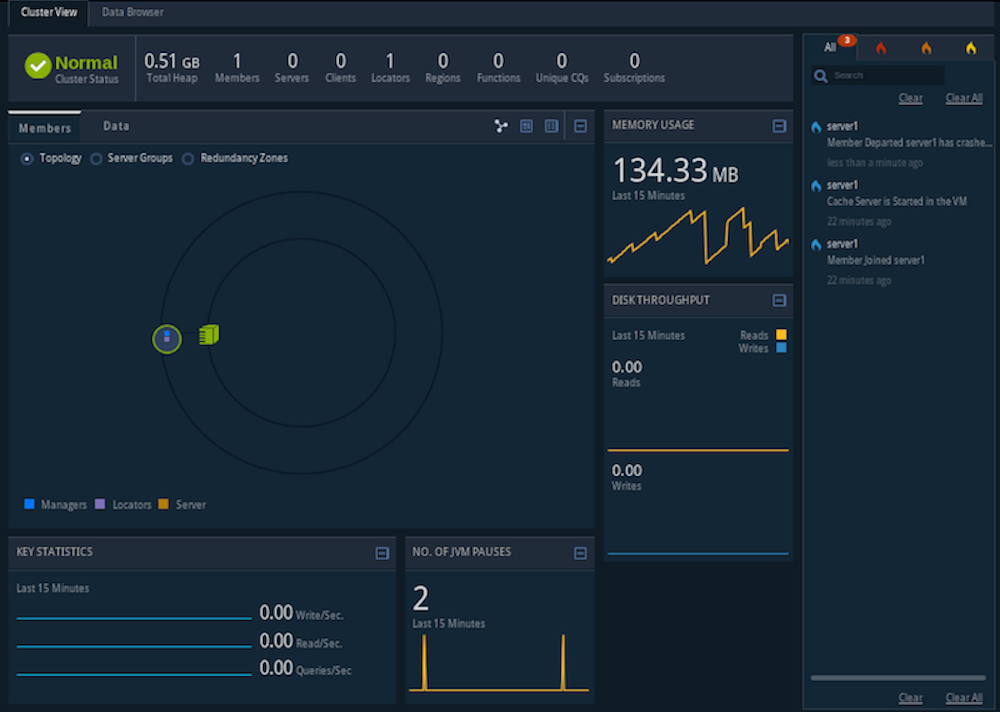
Start up the browser-based Pulse monitoring tool. Pulse is a Web Application that provides a graphical dashboard for monitoring vital, real-time health and performance of Geode clusters, members, and regions. See Geode Pulse.
gfsh>start pulse
This command launches Pulse and automatically connects you to the JMX Manager running in the Locator. At the Pulse login screen, type in the default username admin and password admin.
The Pulse application now displays the locator you just started (locator1):
Step 4: Start a server
A Geode server is a process that runs as a long-lived, configurable member of a cluster. The Geode server is used primarily for hosting long-lived data regions and for running standard Geode processes such as the server in a client/server configuration. See Running Geode Server Processes.
Start the cache server:
gfsh>start server --name=server1 --server-port=40411
This commands starts a cache server named “server1” on the specified port of 40411.
If you run start server from gfsh without specifying the member name, gfsh will automatically pick a random member name. This is useful for automation.
Observe the changes (new member and server) in Pulse. Try expanding the distributed system icon to see the locator and cache server graphically.
Step 5: Create a replicated, persistent region
In this step you create a region with the gfsh command line utility. Regions are the core building blocks of the Geode cluster and provide the means for organizing your data. The region you create for this exercise employs replication to replicate data across members of the cluster and utilizes persistence to save the data to disk. See Data Regions.
Create a replicated, persistent region:
gfsh>create region --name=regionA --type=REPLICATE_PERSISTENT
Member  | Status
------- | --------------------------------------
server1 | Region "/regionA" created on "server1"
Note that the region is hosted on server1.
Use the
gfshcommand line to view a list of the regions in the cluster.gfsh>list regions List of regions --------------- regionAList the members of your cluster. The locator and cache server you started appear in the list:
gfsh>list members
  Name       | Id
------------ | ---------------------------------------
Coordinator: | 192.0.2.0(locator1:3529:locator)<ec><v0>:59926
locator1     | 192.0.2.0(locator1:3529:locator)<ec><v0>:59926
server1      | 192.0.2.0(server1:3883)<v1>:65390
To view specifics about a region, type the following:
gfsh>describe region --name=regionA
..........................................................
Name            : regionA
Data Policy     : persistent replicate
Hosting Members : server1

Non-Default Attributes Shared By Hosting Members

 Type  | Name | Value
------ | ---- | -----
Region | size | 0
In Pulse, click the green cluster icon to see all the new members and new regions that you just added to your cluster.
Note: Keep this gfsh prompt open for the next steps.
Step 6: Manipulate data in the region and demonstrate persistence
Apache Geode manages data as key/value pairs. In most applications, a Java program adds, deletes and modifies stored data. You can also use gfsh commands to add and retrieve data. See Data Commands.
Run the following
putcommands to add some data to the region:gfsh>put --region=regionA --key="1" --value="one" Result : true Key Class : java.lang.String Key : 1 Value Class : java.lang.String Old Value : <NULL> gfsh>put --region=regionA --key="2" --value="two" Result : true Key Class : java.lang.String Key : 2 Value Class : java.lang.String Old Value : <NULL>Run the following command to retrieve data from the region:
gfsh>query --query="select * from /regionA"

Result     : true
startCount : 0
endCount   : 20
Rows       : 2

Result
------
two
one
Note that the result displays the values for the two data entries you created with the
putcommands.See Data Entries.
Stop the cache server using the following command:
gfsh>stop server --name=server1
Stopping Cache Server running in /home/username/my_geode/server1 on ubuntu.local[40411] as server1...
Process ID: 3883
Log File: /home/username/my_geode/server1/server1.log
....
Restart the cache server using the following command:
gfsh>start server --name=server1 --server-port=40411Run the following command to retrieve data from the region again – notice that the data is still available:
gfsh>query --query="select * from /regionA"

Result     : true
startCount : 0
endCount   : 20
Rows       : 2

Result
------
two
one
Because regionA uses persistence, it writes a copy of the data to disk. When a server hosting regionA starts, the data is populated into the cache. Note that the result displays the values for the two data entries you created with the
putcommands prior to stopping the server.See Data Entries.
See Data Regions.
Step 7: Examine the effects of replication
In this step, you start a second cache server. Because regionA is replicated, the data will be available on any server hosting the region.
See Data Regions.
Start a second cache server:
gfsh>start server --name=server2 --server-port=40412Run the
describe regioncommand to view information about regionA:gfsh>describe region --name=regionA .......................................................... Name : regionA Data Policy : persistent replicate Hosting Members : server1 server2 Non-Default Attributes Shared By Hosting Members Type | Name | Value ------ | ---- | ----- Region | size | 2Note that you do not need to create regionA again for server2. The output of the command shows that regionA is hosted on both server1 and server2. When gfsh starts a server, it requests the configuration from the cluster configuration service which then distributes the shared configuration to any new servers joining the cluster.
Add a third data entry:
gfsh>put --region=regionA --key="3" --value="three"
Result      : true
Key Class   : java.lang.String
Key         : 3
Value Class : java.lang.String
Old Value   : <NULL>
Open the Pulse application (in a Web browser) and observe the cluster topology. You should see a locator with two attached servers. Click the Data tab to view information about regionA.
Stop the first cache server with the following command:
gfsh>stop server --name=server1
Stopping Cache Server running in /home/username/my_geode/server1 on ubuntu.local[40411] as server1...
Process ID: 4064
Log File: /home/username/my_geode/server1/server1.log
....
Retrieve data from the remaining cache server.
gfsh>query --query="select * from /regionA"

Result     : true
startCount : 0
endCount   : 20
Rows       : 3

Result
------
two
one
three
Note that the data contains 3 entries, including the entry you just added.
Add a fourth data entry:
gfsh>put --region=regionA --key="4" --value="four"
Result      : true
Key Class   : java.lang.String
Key         : 3
Value Class : java.lang.String
Old Value   : <NULL>
Note that only server2 is running. Because the data is replicated and persisted, all of the data is still available. But the new data entry is currently only available on server 2.
gfsh>describe region --name=regionA
..........................................................
Name            : regionA
Data Policy     : persistent replicate
Hosting Members : server2

Non-Default Attributes Shared By Hosting Members

 Type  | Name | Value
------ | ---- | -----
Region | size | 4
Stop the remaining cache server:
gfsh>stop server --name=server2
Stopping Cache Server running in /home/username/my_geode/server2 on ubuntu.local[40412] as server2...
Process ID: 4185
Log File: /home/username/my_geode/server2/server2.log
.....
Step 8: Restart the cache servers in parallel
In this step you restart the cache servers in parallel. Because the data is persisted, the data is available when the servers restart. Because the data is replicated, you must start the servers in parallel so that they can synchronize their data before starting.
Start server1. Because regionA is replicated and persistent, it needs data from the other server to start and waits for the server to start:
gfsh>start server --name=server1 --server-port=40411
Starting a Geode Server in /home/username/my_geode/server1...
............................................................................
............................................................................
Note that if you look in the server1.log file for the restarted server, you will see a log message similar to the following:
[info 2015/01/14 09:08:13.610 PST server1 <main> tid=0x1] Region /regionA has pot
entially stale data. It is waiting for another member to recover the latest data.
  My persistent id:

    DiskStore ID: 8e2d99a9-4725-47e6-800d-28a26e1d59b1
    Name: server1
    Location: /192.0.2.0:/home/username/my_geode/server1/.

  Members with potentially new data:
  [
    DiskStore ID: 2e91b003-8954-43f9-8ba9-3c5b0cdd4dfa
    Name: server2
    Location: /192.0.2.0:/home/username/my_geode/server2/.
  ]
  Use the "gfsh show missing-disk-stores" command to see all disk stores that
are being waited on by other members.
In a second terminal window, change directories to the scratch working directory (for example,
my_geode) and start gfsh:[username@localhost ~/my_geode]$ gfsh _________________________ __ / _____/ ______/ ______/ /____/ / / / __/ /___ /_____ / _____ / / /__/ / ____/ _____/ / / / / /______/_/ /______/_/ /_/ 1.14 Monitor and Manage GeodeRun the following command to connect to the cluster:
gfsh>connect --locator=localhost[10334]
Connecting to Locator at [host=localhost, port=10334] ..
Connecting to Manager at [host=ubuntu.local, port=1099] ..
Successfully connected to: [host=ubuntu.local, port=1099]
Start server2:
gfsh>start server --name=server2 --server-port=40412When server2 starts, note that server1 completes its start up in the first gfsh window:
Server in /home/username/my_geode/server1 on ubuntu.local[40411] as server1 is currently online.
Process ID: 3402
Uptime: 1 minute 46 seconds
Geode Version: 1.14
Java Version: 1.8.0_121
Log File: /home/username/my_geode/server1/server1.log
JVM Arguments: -Dgemfire.default.locators=192.0.2.0[10334] -Dgemfire.use-cluster-configuration=true
-XX:OnOutOfMemoryError=kill -KILL %p -Dgemfire.launcher.registerSignalHandlers=true
-Djava.awt.headless=true -Dsun.rmi.dgc.server.gcInterval=9223372036854775806
Class-Path: /home/username/Apache_Geode_Linux/lib/geode-core-1.0.0.jar:
/home/username/Apache_Geode_Linux/lib/geode-dependencies.jar
Verify that the locator and two servers are running:
gfsh>list members
  Name       | Id
------------ | ---------------------------------------
Coordinator: | ubuntu(locator1:2813:locator)<ec><v0>:46644
locator1     | ubuntu(locator1:2813:locator)<ec><v0>:46644
server2      | ubuntu(server2:3992)<v8>:21507
server1      | ubuntu(server1:3402)<v7>:36532
Run a query to verify that all the data you entered with the
putcommands is available:gfsh>query --query="select * from /regionA" Result : true startCount : 0 endCount : 20 Rows : 5 Result ------ one two four Three NEXT_STEP_NAME : ENDStop server2 with the following command:
gfsh>stop server --dir=server2
Stopping Cache Server running in /home/username/my_geode/server2 on 192.0.2.0[40412] as server2...
Process ID: 3992
Log File: /home/username/my_geode/server2/server2.log
....
Run a query to verify that all the data you entered with the
putcommands is still available:gfsh>query --query="select * from /regionA" Result : true startCount : 0 endCount : 20 Rows : 5 Result ------ one two four Three NEXT_STEP_NAME : END
Step 9: Shut down the system including your locators
To shut down your cluster, do the following:
In the current
gfshsession, stop the cluster:gfsh>shutdown --include-locators=trueSee shutdown.
When prompted, type ‘Y’ to confirm the shutdown of the cluster.
As a lot of data in memory will be lost, including possibly events in queues,
do you really want to shutdown the entire distributed system? (Y/n): Y
Shutdown is triggered

gfsh>
No longer connected to ubuntu.local[1099].
gfsh>
Type
exitto quit the gfsh shell.
Step 10: What to do next…
Here are some suggestions on what to explore next with Apache Geode:
- Continue reading the next section to learn more about the components and concepts that were just introduced.
- To get more practice using
gfsh, see Tutorial—Performing Common Tasks with gfsh. - To learn about the cluster configuration service, see Tutorial—Creating and Using a Cluster Configuration.